Makeup
4- Step Guide To Whip Your Own Homemade Lip Balm With All Natural Ingredients!
Don’t we all want soft and luscious lips👄?! But one of the hardest things to do in life is providing...
By: Beauty Insider Journalist / June 1, 2020
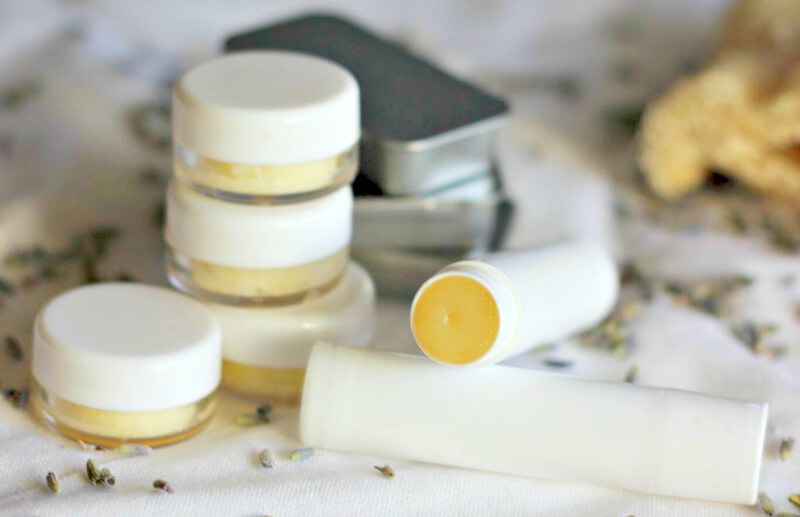
Don’t we all want soft and luscious lips👄?! But one of the hardest things to do in life is providing your lips with enough nourishment they need. The lips do tend to get dry the fastest and easiest compared to the rest of the skin because the skin on your lips is super sensitive, and it’s likely to fall victim to our lifestyle, sun, dehydration and basically everything! That is why keep your lips moisturised is so important! Now, we know lip balms, in general, can be expensive so to help you some cash while keeping your lips nourished, Beauty Insider Malaysia present you a simple 4-step guide to homemade lip balm!
Not just is homemade lip balm is a way cheaper and affordable alternative to those sold in store but they are also natural and safer too! So, if all these while you neglected your lips now it is time to show the sexiest feature of your body so TLC it deserves😉. Cuz, let’s be honest, nobody wants to pout if you’re suffering from dry, peeling, and chapped lips. And what’s better than using natural ingredients to hydrate and help them heal faster? So, whatcha waiting for? Read on to know more on how to make 100% natural homemade lip balm. It is also a great gift to impress your friends and loved ones!
Contents
4 Simple Steps to Make Homemade Lip Balm!

For this recipe, we are using shea butter (because we are sucker butter!!!!) which is a commonly used ingredient in many commercially available lip balms😘. Shea butter is known for its nourishing and moisturising properties. Extracted from the nut of the African shea tree, shea butter also has anti-inflammatory and healing properties while is super soothing on your skin. Packed with good fats and vitamins, it also tastes super goooood😍! But of course, if you aren’t a fan of shea butter feel free to use basically any fruits, herbs or ingredients you want! The steps remain the same.
What Are the Ingredients Needed?

- 1 tablespoon of pure shea butter
- 1 tablespoon beeswax
- 1 tablespoon raw, organic coconut oil
- 1 teaspoon raw honey
- 4-5 drop of any essential oil of your choice
What To Do Next?
1. Start by adding the shea butter, beeswax, and coconut oil to a pot,
2. Create a double boiler to heat the ingredients on your stove,
3. Once they melt, whisk in raw honey and the essential oil into the mixture,
4. Let is cool down and then transfer into tubes or jars as per your preference,
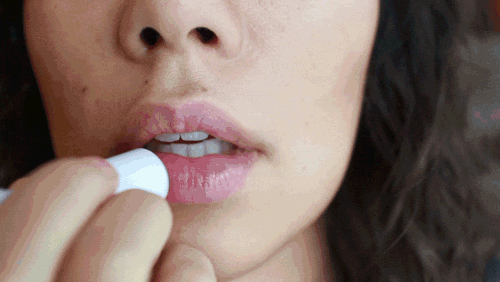
And waa-laa, there you have your very own lip balm👏. Apply this whenever you feel like your lips need some moisturizing. You can also coat lipstick over your lip balm as it will give add a nice shine to your lips! Oh, since it is 100% natural and organic, you can even eat it (HAHA, don’t do that please, we are just kidding!!!!) Plus, Ingredients like coconut oil, beeswax, and cocoa butter have natural SPF properties, so adding them helps your lips can help protect your lips from harsh sun rays too🌻!
How to Take Care Of Your Homemade Lip Balm?
Now that you know how to make your very own homemade lip balm, then the next step is ensuring your lip balm last long. Remember, we did not add any preservatives or chemical that can elongate its shelve life so these bunch of tips that will come in handy while you’re storing your lip balm💋. So, make sure to take good care of your homemade lip balm. Stored and care properly it can last up to 3 months! After that, make another again- this time a peppermint lip balm, maybe?!
- Make sure the jars or containers you use for your homemade lip balm is clean and dry.
- Keep your homemade lip balm in the refrigerator to keep ingredients fresh.
- Keep your freshly made lip balm at room temperature to solidify.
- Don’t place freshly made lip balm in the freezer as it will lose its form and potent qualities.
- You can add ingredients like menthol or camphor to ease any pain from the dryness.
Now that you know everything there is for you to know to create your own DIY homemade lip balm now it is time to unleash the scientist for a fun project. And the best part? You have all the freedom in the world to customize everything from the colour, the texture, and the content. Now, we know you are excited to try, so make sure to try and do let us know how did your homemade lip balm turn out. Good luck, lovelies 💓