Wellness
13 Simple Yoga Moves To Do At Home For A Healthier and Happier You.
Namaste, how are you doing? Hope you are safe and home! Well, with the recent lockdown, we are all required...
By: Beauty Insider Journalist / March 17, 2020
Namaste, how are you doing? Hope you are safe and home! Well, with the recent lockdown, we are all required to stay home (for the best of everyone) but that doesn’t mean you have to lock yourself and stare at the wall! Why not use this time to improve your health and wellness by trying out some basic yoga exercises at home.
Yes, you heard us right, YOGA! Wait, before you rant on how exacerbating it can be, let’s first clarify, yoga is pretty simple to do! In fact, all you need is a good mat, some space and strong will power. Do you think you’ve got these?
Contents
- Why Should I Do Yoga, You May Ask?!
- Teach Me Some Simple Yoga Poses To Do At Home!!!
- 1. Downward-Facing Dog (Adho mukha svanasana)
- 2. Cat-Cow Stretch (Chakravakasana)
- 3. Warrior (Virabhadrasana)
- 4. Bridge Pose (Setu bandha Sarvangasana)
- 5. Seated Forward Fold (Paschimottanasana)
- 6. Plank Pose (Kumbhakasana)
- 7. Upward-Facing Dog (Urdhva Mukha Svanasana)
- 8. Chair Pose (Utkatasana)
- 9. Bound Ankle Pose (Baddha Konasana)
- 10. Corpse Pose (Savasana)
- 11. Mountain Pose (Tadasana)
- 12. Tree Pose (Vrksasana)
- 13. Side plank (Vasisthasana)
- Take It Slow and Don’t Pressure Yourself!
Why Should I Do Yoga, You May Ask?!
Because yoga has become the exercise du jour in recent years for good reasons. Practising yoga has serious health benefits beyond flexibility and balance. Yes, yoga does everything! From fighting mental health issues like anxiety, depression, and stress to reducing body acne, muscle tightness and inflammation in the body, yoga is all you need to do! Believe it or not, yoga can even make migraines disappear!
Teach Me Some Simple Yoga Poses To Do At Home!!!

Now, do you see why you should start incorporating yoga to your quarantine time? If yes, then we are pretty sure you don’t know where to start. Yoga may seem complicated with all the alien’s lingos and acrobatic poses so to help all your yoga newbies, we went to a certified yoga instructor, Thigambarshini to help put together a definitive guide to 10 simple yoga poses for beginners to do at home.
1. Downward-Facing Dog (Adho mukha svanasana)

How to Do:
Spread your legs and bend downwards without bending your knees. Make sure to tuck your toes and lift your hips up and back to lengthen your spine. If your hamstrings feel a little tight, then keep your knees slightly bent in order to bring your weight back into the legs.
Benefits:
- Opens your shoulders
- Lengthens your spine
- Stretches your hamstrings
- Creates a calming effect
Precaution alert: We know some people cannot keep a straight knee. So, for those who can’t keep a straight knee, you can bend your knees. Make sure your knee is touching the belly but the spine must be elongated!
2. Cat-Cow Stretch (Chakravakasana)
:max_bytes(150000):strip_icc()/About-A3-CatCow-019-570d44f83df78c7d9e3c571e.jpg)
How to Do:
Get on your knees with your palm placed directly under your shoulder. Then, extend your spine and stretch as much as you could. You can repeat this a couple of times as moving back and forth awakens and warms the back
Benefits:
- Good for spinal flexion.
- Awakens and warms the back
- Improves body awareness
- Coordinates your movements to your breath
Precaution alert: Avoid doing Cat-Cow pose if have back pain.
3. Warrior (Virabhadrasana)
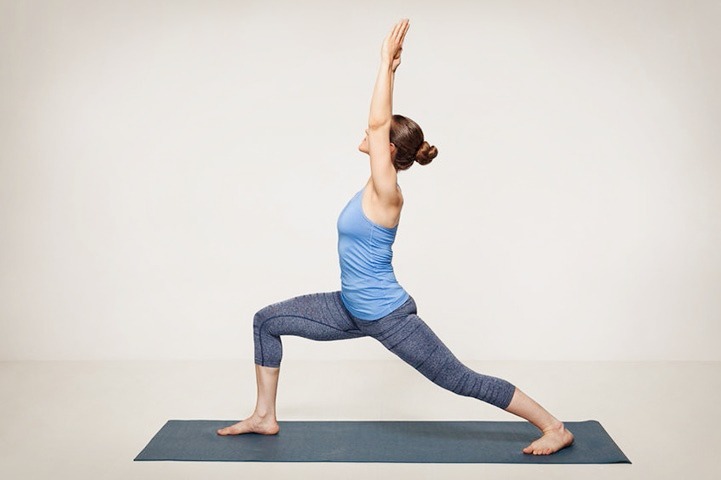
How to Do:
Stand with feet wide like 3–4 feet apart. Shift your right heel out so your toes are pointing slightly inward. Turn your left foot out 90 degrees. Line up your left heel with the arch of your right foot. To draw your shoulder blades down the back, rotate your palms face-up. Notice how that shifts your shoulders. Once settled, rotate your palms face down.
Benefits:
- Help calm and steady your mind
- Strengthens your legs and ankles
- Increases stamina
4. Bridge Pose (Setu bandha Sarvangasana)

How to Do:
Lie faceup with your knees bent. Your feet must be flat on the floor, and arms at your sides with palms facing down. Keep your feet parallel and hip-width apart, heels stacked under knees. Press the floor away with your feet and lift the hips off the floor toward the sky. Make sure to suck in your glutes and hold up for at least 5-10 seconds.
Benefits:
- Opens your chest
- Stretches your neck and spine
- Reduce belly fat
- Calm the mind
- Help improve digestion
5. Seated Forward Fold (Paschimottanasana)
/Verywell-11-3567193-SeatedForward-986-5c54a76246e0fb000152e740.jpg)
How to Do:
Sit and straighten your legs out in front of you. Make sure your thighs are grounded into the floor. Yes, it’s hard but try not to let your thigh lift up! Hinge at the hips to elongate your torso over your thighs. Grab hold of the outer edges of your feet. Hold the pose for 5-10 seconds. If your hamstrings feel tight, grab a strap and loop it behind your feet it will help you fold forward better.
Benefits:
- Elongates the back of your body
- Lengthens your spine
- Tighten your core muscle
- Stretches your hamstrings
6. Plank Pose (Kumbhakasana)

How to Do:
Lie flat on your mat with your stomach. Place your hands under the shoulder. Also, shift forward so your shoulders are stacked over your wrists. Draw your navel in toward your spine and keep your hips from dropping. Then, lift yourself up! Planks are super beneficial so try holding a plank for at least 30 seconds every day. As you get better then you can hold up longer.
Benefits:
Click here to find out all the benefits of holding pranks every day.
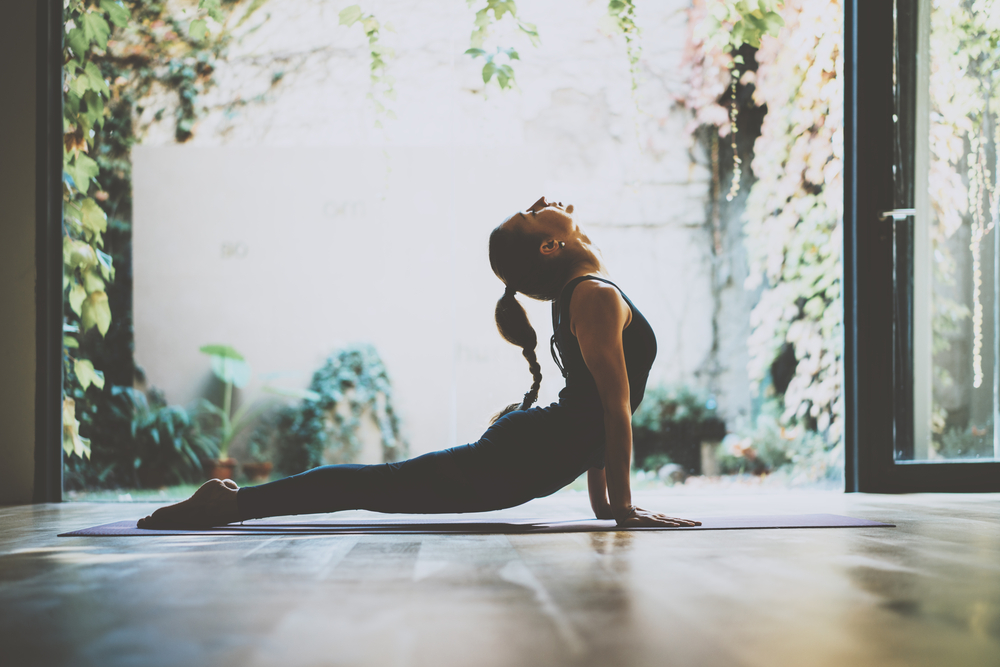
7. Upward-Facing Dog (Urdhva Mukha Svanasana)

How to Do:
This is slightly hard to do but you can! First, lie facing downwards on the floor. Bend elbows and place hands on the mat in line with lower ribs. Hug your elbows in line with your torso. Tuck your toes and take an inhale. Push your body upwards and make sure your arms are straightened and the chest broadens.
Benefits:
- Opens up your chest and shoulders
- Stretches the abdominals and hip flexors
- Improves blood circulation
- Elongates the spine
Precaution alert: This pose is never recommended for anyone with slip disk or with c3&4 issues or any spine issues.
8. Chair Pose (Utkatasana)
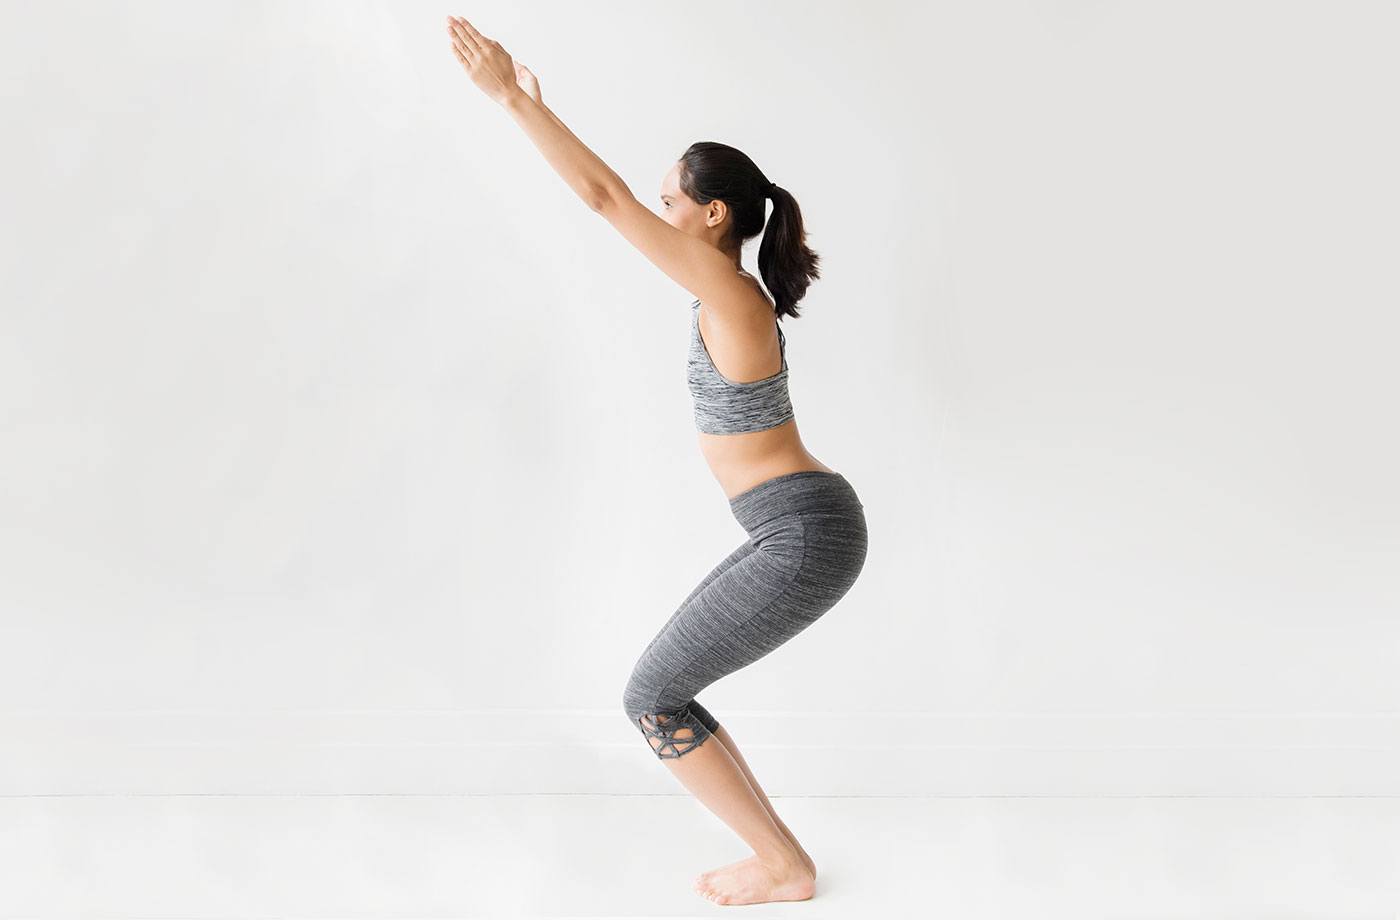
How to Do:
Start in mountain pose then raise your arms upwards. Spread your fingers and reach up through your fingertips. Sit back and down as if sitting into a chair. Shift your weight toward the heels and lengthen up through the spine. Hold the position for 10 seconds! You can do it!!!!
Benefits:
- Strengthens your legs, upper back, and shoulders.
- Tightens the thighs
- Give you a toner butt
9. Bound Ankle Pose (Baddha Konasana)

How to Do:
Sit on the floor with your knees inwards and open them out to the side like a book. Join the soles of your feet together while sitting upright. Place fingertips on the floor directly behind you and lengthen up through the spine. You can also hold onto your ankles and hinge forward at the hips.
Benefits:
- Give your inner thighs and groin a nice stretch
- Creates a calming, cooling effect.
10. Corpse Pose (Savasana)

How to Do:
Lie faceup, bringing your legs to the outer edges of your mat, like a starfish. Splay your feet out to the sides. Place arms along sides, palms facing up. Close your eyes and relax.
Benefits:
- Relaxes the whole body
- Gives you space to absorb the benefits of the practice
11. Mountain Pose (Tadasana)

How to Do:
This is the most basic move in yoga and the best way to start your yoga at home journey. Simple yet effective, all you gotta do is stand with your feet together and hip-width apart. Then fold your feet in tight. After that, draw your shoulder blades and lift the crown of your head up.
Benefits:
- Strengthen your thighs
- Draw your belly button in
- Lengthen up through the spine
- Promotes balance and stability
12. Tree Pose (Vrksasana)

How to Do:
To do the tree pose you have to first start in mountain pose. Then find a fixed point in front of you and stare at it to help you balance. Slowly, shift the weight into your left foot and lift your right foot and fold it into your shin or inner thigh. You may struggle with balance issue at first but try and push yourself to hold the position for at least 10 seconds! You can take it a step further and lift your hands up toward the sky in a V-shape.
Benefits:
- Improves blood circulation
- Strengthens the arches of the feet and the outer hips
- Makes the legs stronger
- Gives you more flexibility
13. Side plank (Vasisthasana)
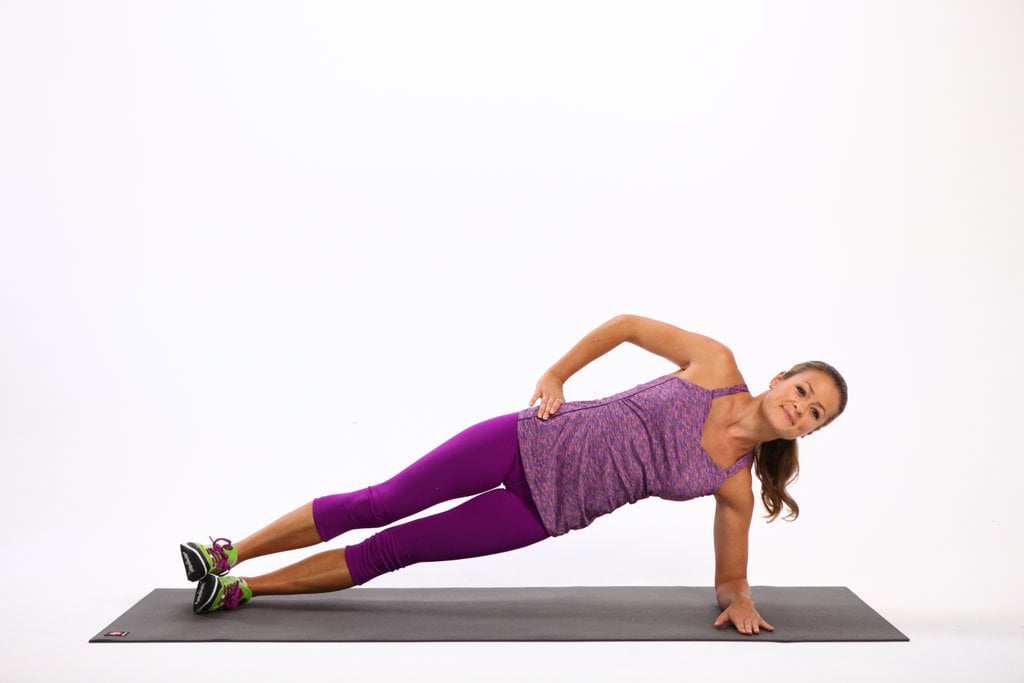
How to Do:
Side planks are hard but they are doable! First, start off with a normal plank position. Then, turn onto the outer edge of your right foot. Make sure that your right foot and right hand are in alignment. Then, stack your left foot on top of your right and support your weight using your left hand! Once you are stable, lift yourself up and try to lift your left hand up toward the sky. Hold the position for at least 30 seconds. Balance yourself by pressing the floor away from you with the bottom hand.
Benefits:
- Strengthens your shoulders
- Make your abdominals stronger
- Promotes core and scapular stability
- Builds arm muscles
Take It Slow and Don’t Pressure Yourself!

If it is your first time doing yoga, then don’t beat yourself too hard! The goal here is to have fun at the same time workout! So, whatever poses that you’re working on, remember this: yoga asana is not about perfection but about progression!
It’s about becoming comfortable with the uncomfortable. It is about pushing your body and challenging yourself. Ultimately, it’s about the beautiful correlation between the mind and body. Even if all you do is arrive on the mat and lay in savasana for 15 minutes, just remember you are trying and keep trying!
Give it your best and let that be good enough for today. Overdoing can lead to unwanted mishaps so, remember do not do anything intensely! If you want to explore more about yoga it’s always best to do so with a teacher or a guru. Hope this was helpful. Stay safe and namaste, my friend🙏!