Hair
Your One Two Step Guide On How To Bleach Your Hair At Home
We all love experimenting with our hair. Whether it’s getting an extreme hair makeover, or just a little trim, there...
By: Cherelle Lim / October 22, 2021

We all love experimenting with our hair. Whether it’s getting an extreme hair makeover, or just a little trim, there is something we all long for. That is bleaching and dyeing our hair! Come on, you’ve definitely always wanted to bleach your hair all shades of the rainbow when you were younger! Now, your dreams can come true! Although bleaching and dyeing services at salons can be quite pricey, nothing ever hurts a little Do It Yourself challenge.
With the right tools and ingredients, you can easily bleach your hair at home safely and naturally. Well, it won’t be that easy, but Beauty Insider will make it as easy as it needs to be for you! After watching so many “I bleached my hair” videos on youtube, you finally get to try it out. Get ready to turn into Elsa as we give you a step-by-step guide on how to bleach your hair at home.
Contents
What You’ll Need
Here are all the materials you will be needing to successfully bleach your hair at home. We’ve also included some aftercare products that you will be needing as well.
1. Bleach
This is the most essential thing you need to get in order to start bleaching your hair. Without bleach, you can’t even start the process. So, make sure you find a good brand of bleach that you trust. Also, it may be a good idea to get extra bleach just in case. Especially if you have long hair! You don’t want to run out of bleach while in the process of bleaching, right?
2. Developer
The developer usually comes along with a bleaching kit. If you do get a bleaching kit, step one and two will be easy to acquire! But, if you think that the developer within the kit won’t be enough, it doesn’t hurt to go onto Shopee and buy an extra bottle of developer. Same as the bleach, you want to make sure that you have more than enough developer and bleach. Trust us when we say it’s not a good look to leave the house looking like a witch.
3. Toner
Next, you need to get your hands on some toner. Have you watched Brad Mondo? Well, then you are no stranger to toners such as Wella. Do you remember what they do? Toners help neutralise the brassiness of your hair after you’ve bleached it. Depending on how yellow or orange the tone of your hair is, you might need different toners with different undertones.
4. A Gown or Old Clothes
So when bleaching your hair, things can get a bit messy. It is best to change into an old shirt that you no longer want, or just get a gown to drape over your body. If you are afraid that you might stain your floors, leaving newspapers on the area you’ll be bleaching your hair is a good idea too. Better safe than sorry!
5. Hair Clips
When bleaching your hair at home, you’re either doing it yourself or with the help of a friend. Either way, you’ll want to make sure that you section your hair when you bleach your hair. This avoids any inconsistencies on how quickly your hair lightens. Sectioning your hair also gives you a clearer line of vision on the hairs underneath. Thus, you’ll be able to see any blind spots you may have missed. So, hair clips are your best option to section off your hair easily.
6. Gloves & Shower Cap
To protect your hands, make sure to put on a pair of gloves when bleaching your hair at home. This ensures that the bleach doesn’t burn your hands, or leave it with stains and dry it out. You don’t want to end up with peeling hands that are dry for days. Trust us. Don’t just say it’s fine and disregard it. Protect your hands, especially if you have sensitive skin. You never know what bleach can do to your skin. You’ll also need a shower cap or a plastic bag for after you’re done applying the bleach. Wrapping your head in a shower cap helps it lighten and develop faster too.
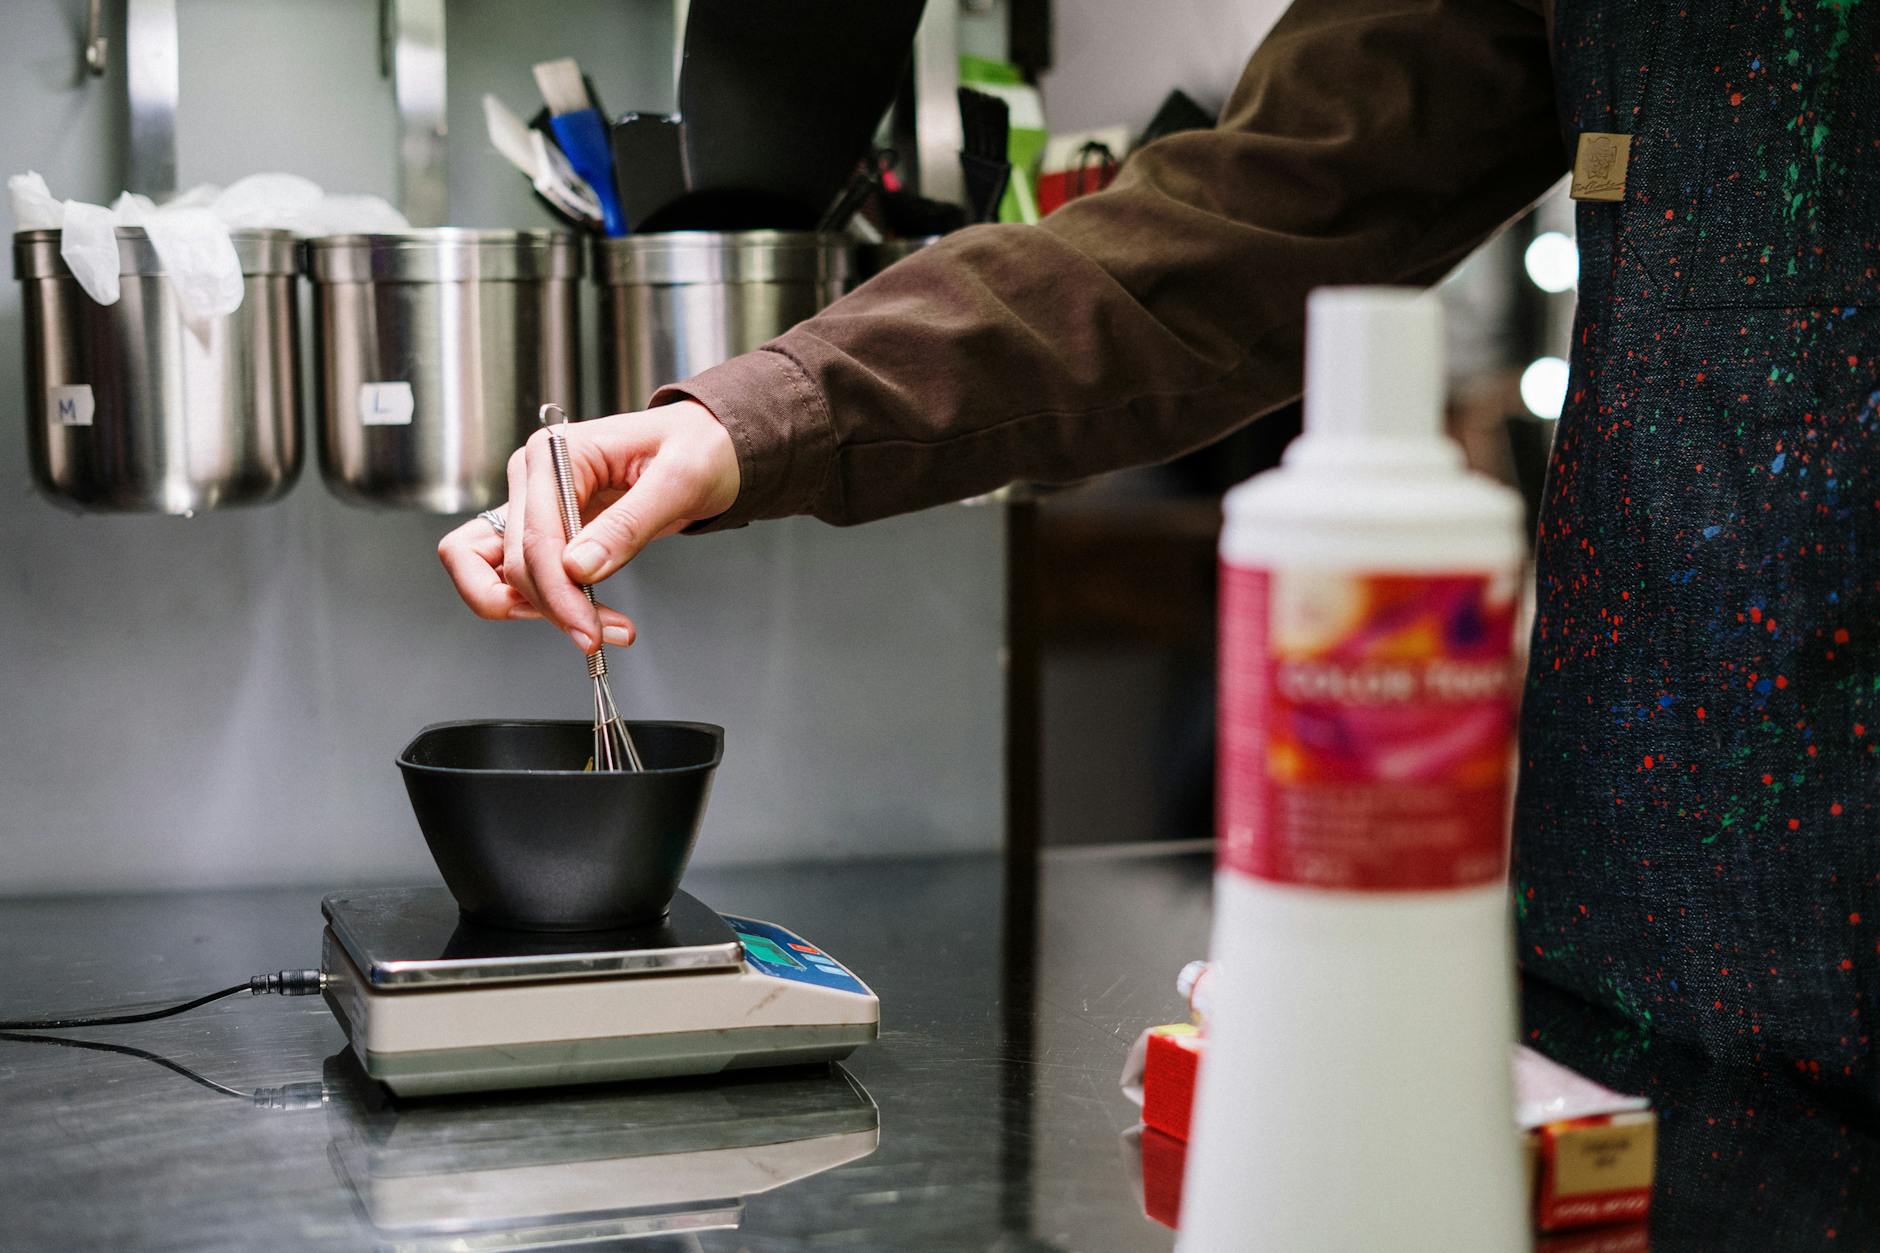
7. Mixing Bowl & Comb
A mixing bowl and a comb is pretty much essential as well. What else are you going to mix the bleach and developer with? How else are you going to apply the bleach solution to your hair? If you don’t want to get a new bowl just for bleaching your hair at home, a container will do just fine.
8. Purple Shampoo & Sulfate-free shampoo
After you’re done bleaching your hair and it’s time to wash it all out, you’ll need to use purple shampoo. You’ll also need to switch out all your regular shampoos for sulfate-free shampoos to protect your now damaged hair. The purple shampoo also helps reduce any yellowness left in your hair and keep your bleached hair looking fresh and new. Keeping its colour intact.
9. Aluminium Foil
You know how if you get your hair done professionally they’ll layer your hair in aluminium foil? Well, that’s because it works similarly to the shower cap. Wrapping your hair in aluminium foil will allow it to lighten faster. Speeding up the process. Trust us, you’ll want the bleaching process to speed by because the hardest part about bleaching your hair at home? Playing the waiting game.
How To Bleach Your Hair

Now for your step-by-step easy guide on how to bleach your hair at home safely. This will have you come out looking like Elsa if that’s the kind of bleached hair you’re going for. Although, that would take a lot of bleach and a lot of rounds of waiting. But if you just want to get to a blonde, we are estimating around two rounds of bleach to get you to a level 8 or 9.
Step 1
Check the state of your hair. If you’ve never bleached or dyed your hair before, it should be your natural virgin hair colour. This ensures that your hair is healthy enough to withstand the bleaching process. If not, you can still bleach your hair even if your hair is damaged from previous bleachings. You just have to be careful and watch it as you bleach. Once it starts falling off, you need to wash it out ASAP. If your hair has been box-dyed black, we do not recommend bleaching your hair by yourself. Box-dye, especially black is hard to get out of your hair. Professional help will save you a lot more than bleaching at home.
Step 2
After you know the state of your hair and have decided to proceed with bleaching your hair at home, you can gather up all your materials mentioned above. Have them ready and standby. It’s also a great trick to not wash your hair 1 or 2 days before bleaching your hair. The oils produced by your scalp and hair will act as an added protection against the bleach. This is why you always hear people saying to not wash your hair if you want to bleach or dye it.
Step 3
Now, you can prep your bleach mixture by adding it into the mixing bowl, and adding the developer. Add in a suitable amount of bleach and developer, ensuring that the mixture is thick enough. Most bleach mixtures will go for a 2 : 1 ratio of developer and bleach. At this point, you can start sectioning your hair into 4 parts. First down the highest point of your head, then across from your ears. It’s also a good idea to work from the back to the front. Making sure that you leave at least two inch from your roots.
Step 4
Now you’re in the Endgame. Once you apply the bleach onto your hair, there’s no turning back. Start from the back sections and use the brush to spread it onto your hair. Make sure you use enough and not just a light layer. You want to coat it completely so that no hairs are visible. Remember to leave at least 2 inches from your roots. Once you’ve applied, you can wrap each section of your hair in aluminium foil, or wait till the end to wrap it all up in a shower cap. Repeat this process for your whole head.
Step 5
Now that you’ve bleached every single strand of your hair, go back in for the roots at the last 10 minutes of the waiting game. Make sure you read the instructions on the bleach packet and follow the waiting time on it. Some may take an hour, while others only need half an hour.
Step 6
After your allotted time is up, you can finally wash it out! Wash with lukewarm water and make sure to get all the products out from your hair. After washing it out, you can use the toner to tone your hair. But, if you’re looking at your hair and thinking it’s not light enough, you can always bleach it again. If your hair can withstand another round of course. If not, tone it and wait two days before bleaching again. We don’t want your hair falling out!
Loved this article? Follow us on Instagram and Facebook for more of the latest beauty news and trends! Shop Beauty. Get Rewarded at Insider Mall now!